
I was inspired by Rebecca Shores’ recent Color Theory for Makeup post (and honestly by all of her incredible looks), especially her ingenious use of pop colors in the inner eye corner. I wanted to do something that utilized this, utilized some bright, summery colors, and tested my lower eyelid shadow application. This coincided with a recent Reddit post from u/HobbitQueen that featured some killer suggestions for rocking statement blush. It occurred to me that since I have a camera, I could indeed take way too many pictures of my entire process of putting this stuff onto my own face, and that other people could perhaps do the same thing by looking at these too many pictures.
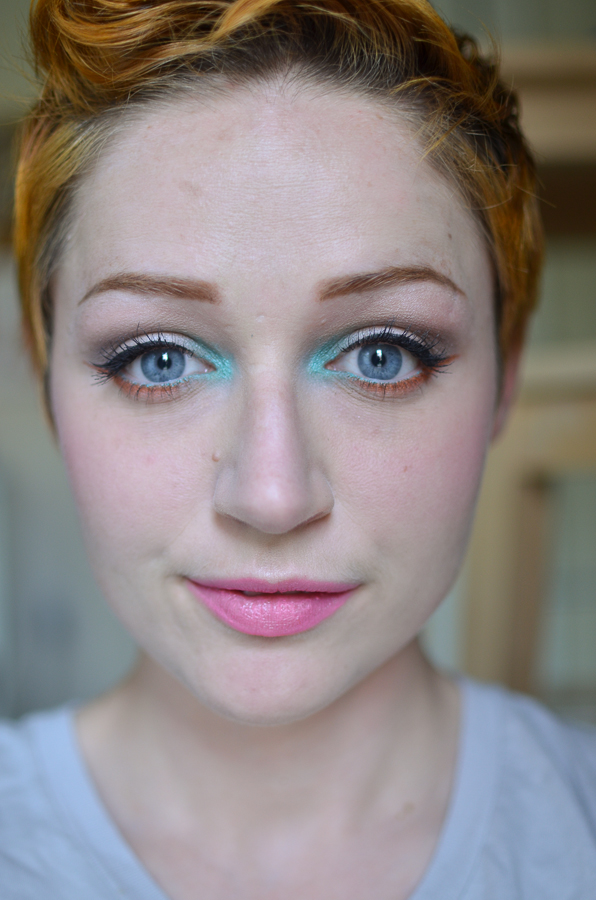
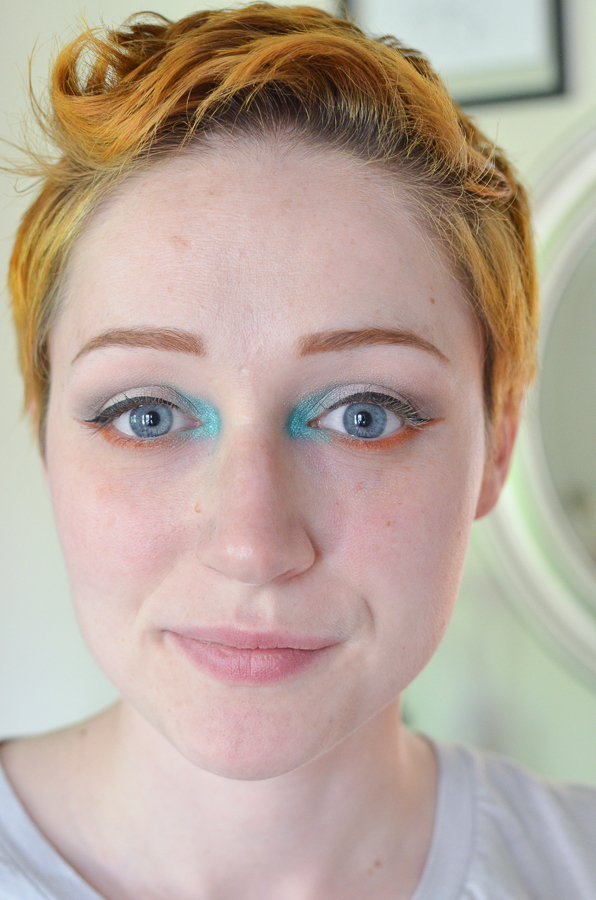
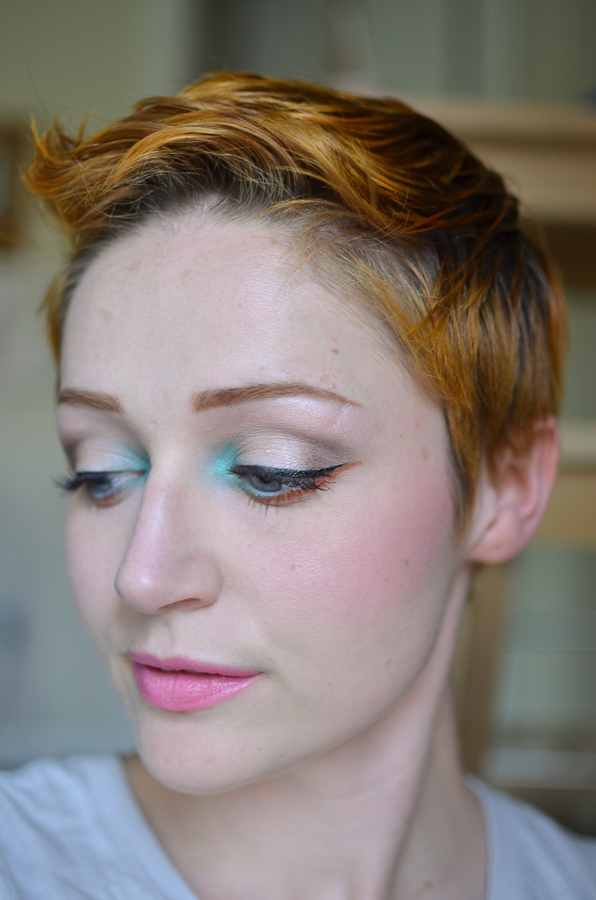
Thus, this makeup monsterpiece was born:
 Additionally, I have swatches of some great Shiro shadows I picked up! Let’s do this!
Swatches
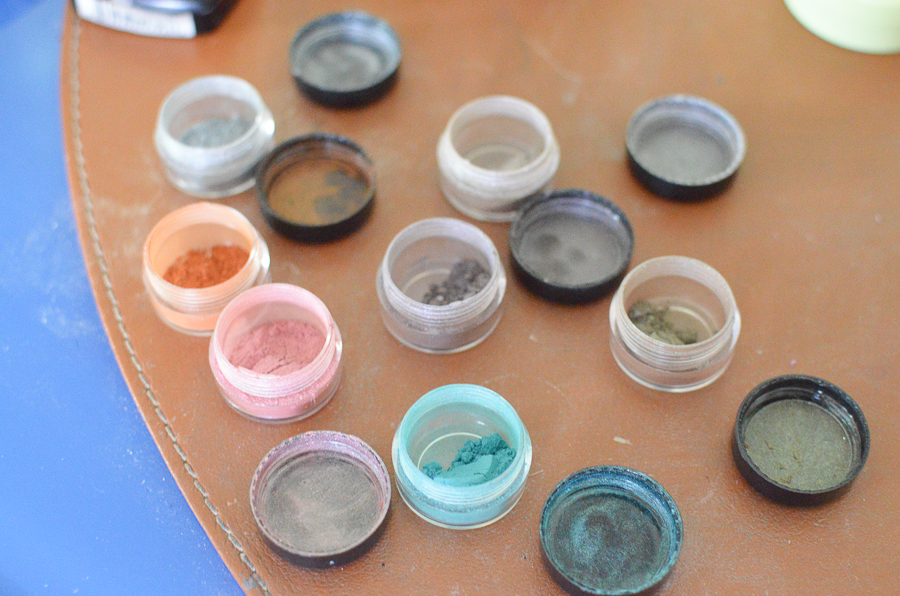
First and foremost, I was able to snag the following Shiro eye shadows from another makeup lover who was passing them along:
- More Sugar- A dusty, cool purple with pinky-shimmer
- Housewife- A light silvery color with pink-ish tones
- Punch Punch Pork- A beautiful soft pink with some shinner
- Steve- TEAL bitches! A brilliant teal
- Steve-O-Lantern- An orange that is both bright and burnt at the same time
- Diggy Diggy Hole- A brown-toned green with shimmer
- Little Brother- A grey purple with lavender shimmer

Here are some arm swatches:
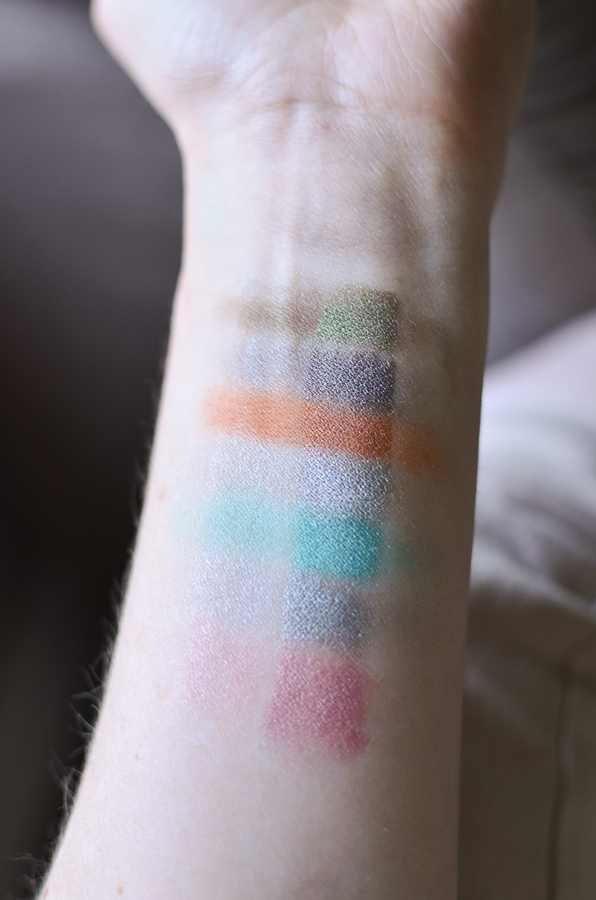
Left column over NARS Smudge-proof Primer, middle column over Fyrinnae Pixie Epoxy, right column bare skin. Top to bottom: Diggy Diggy Hole, More Sugar, Steve-O-Lantern, Housewife, Steve, Little Brother, Punch Punch Pork
This is officially my first experience with Shiro, and I really love these colors! I would say that Steve, Steve-O-Lantern, and More Sugar were really stand outs for me. They were so rich and looked really lush on the skin. Steve-o-Lantern was especially pigmented, applying quite well to bare skin as well as to the primers… what a kick ass orange! I was also impressed with how the Fyrinnae Pixie Epoxy picked up the brilliance of Diggy Diggy Hole– it didn’t look nearly as good over the NARS smudge-proof primer alone, and when I patted it onto the Pixie Epoxy I actually said “Whoaaa” and stared at it for a bit. So pretty!
Punch Punch Pork applied a little more pale than I had expected in comparison to the pigmentation in the container, even with a solid patting motion. I anticipate this will make a very pretty softer look, but I anticipated something more pigmented, I’ll be honest. Housewife and Little Brother were beautiful shadows, but I wouldn’t say necessarily caught my attention in comparison to the others, in either a bad or a good way. I’ll definitely use them, but I was obviously more inspired by my favorites in the bunch that contributed to this look 🙂
Speaking of which, onto the monster!
Blue Tears and Orange Wings
If you for some reason looked at the look above and thought “Whoa, I want that on my face!”, YOU’RE IN LUCK. I took about a billion pictures of the process, and by ordering them sequentially seem to have created some sort of a step-by-step guide for how to, in fact, put this on your face too.
Strap in tight, it’s pretty picture heavy, so we’ll jump right in!
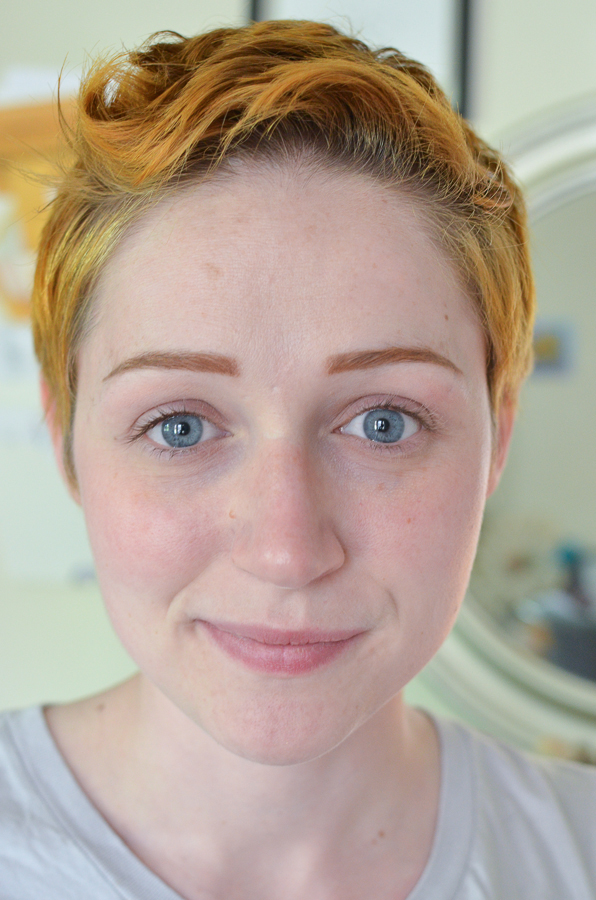
Here is me with a bare face, except for having prepped my eyebrows.
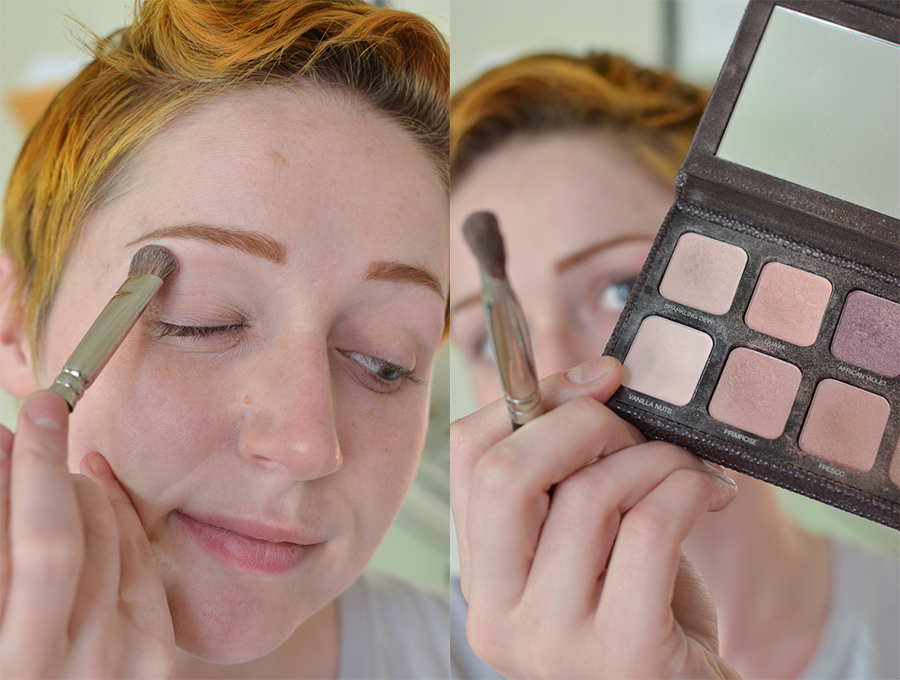
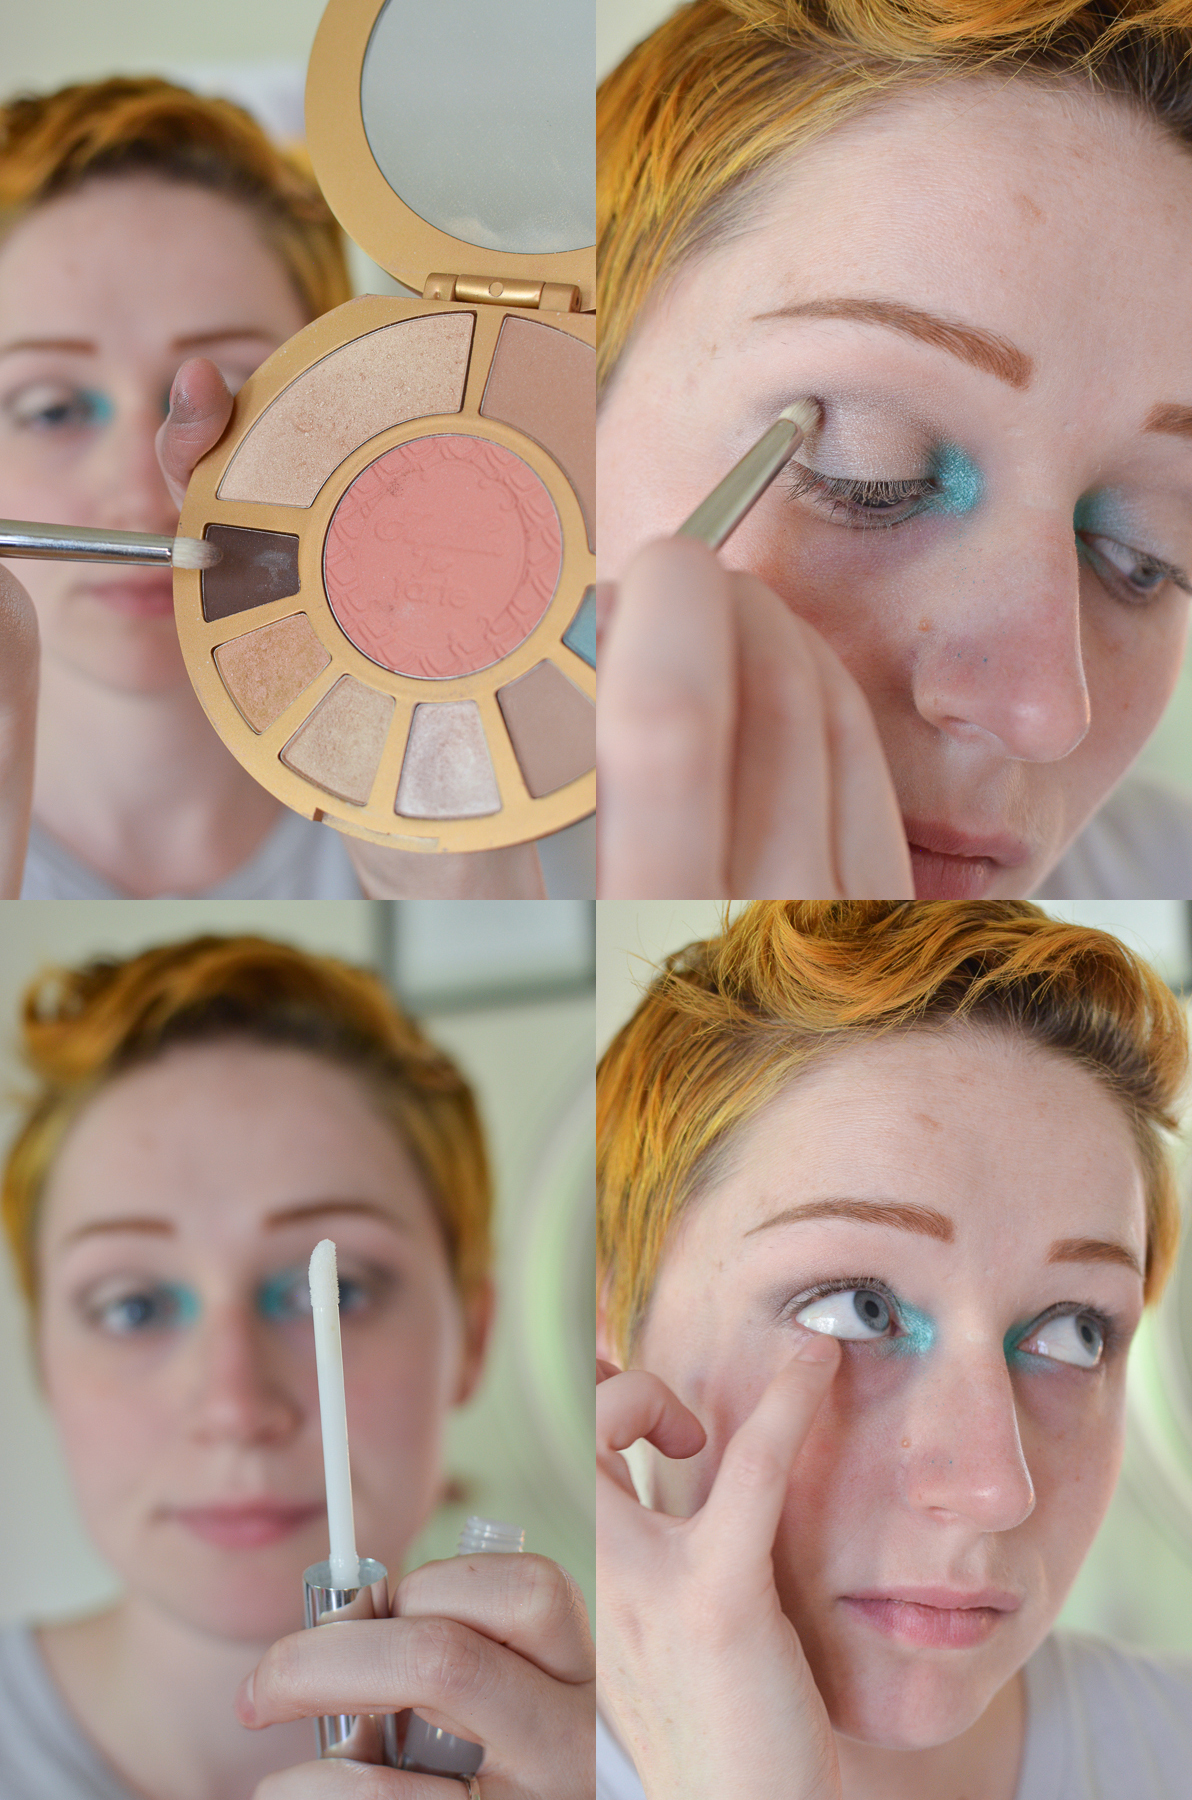
First I applied NARS smudge-proof primer all over the lid, up to the brow bone, and on the bottom lid. Then I applied Laura Mercier Vanilla Nuts (from the 2013 Artist for Eyes Palette) from the crease to the brow. (Oops, those pictures are backwards!)

Next I took Pixie Epoxy and applied it to the inner corner of my eye to help Shiro Steve adhere really well. I patted on Shiro Steve to the inner corner of my eye. Cue feelings of space alien-ness.
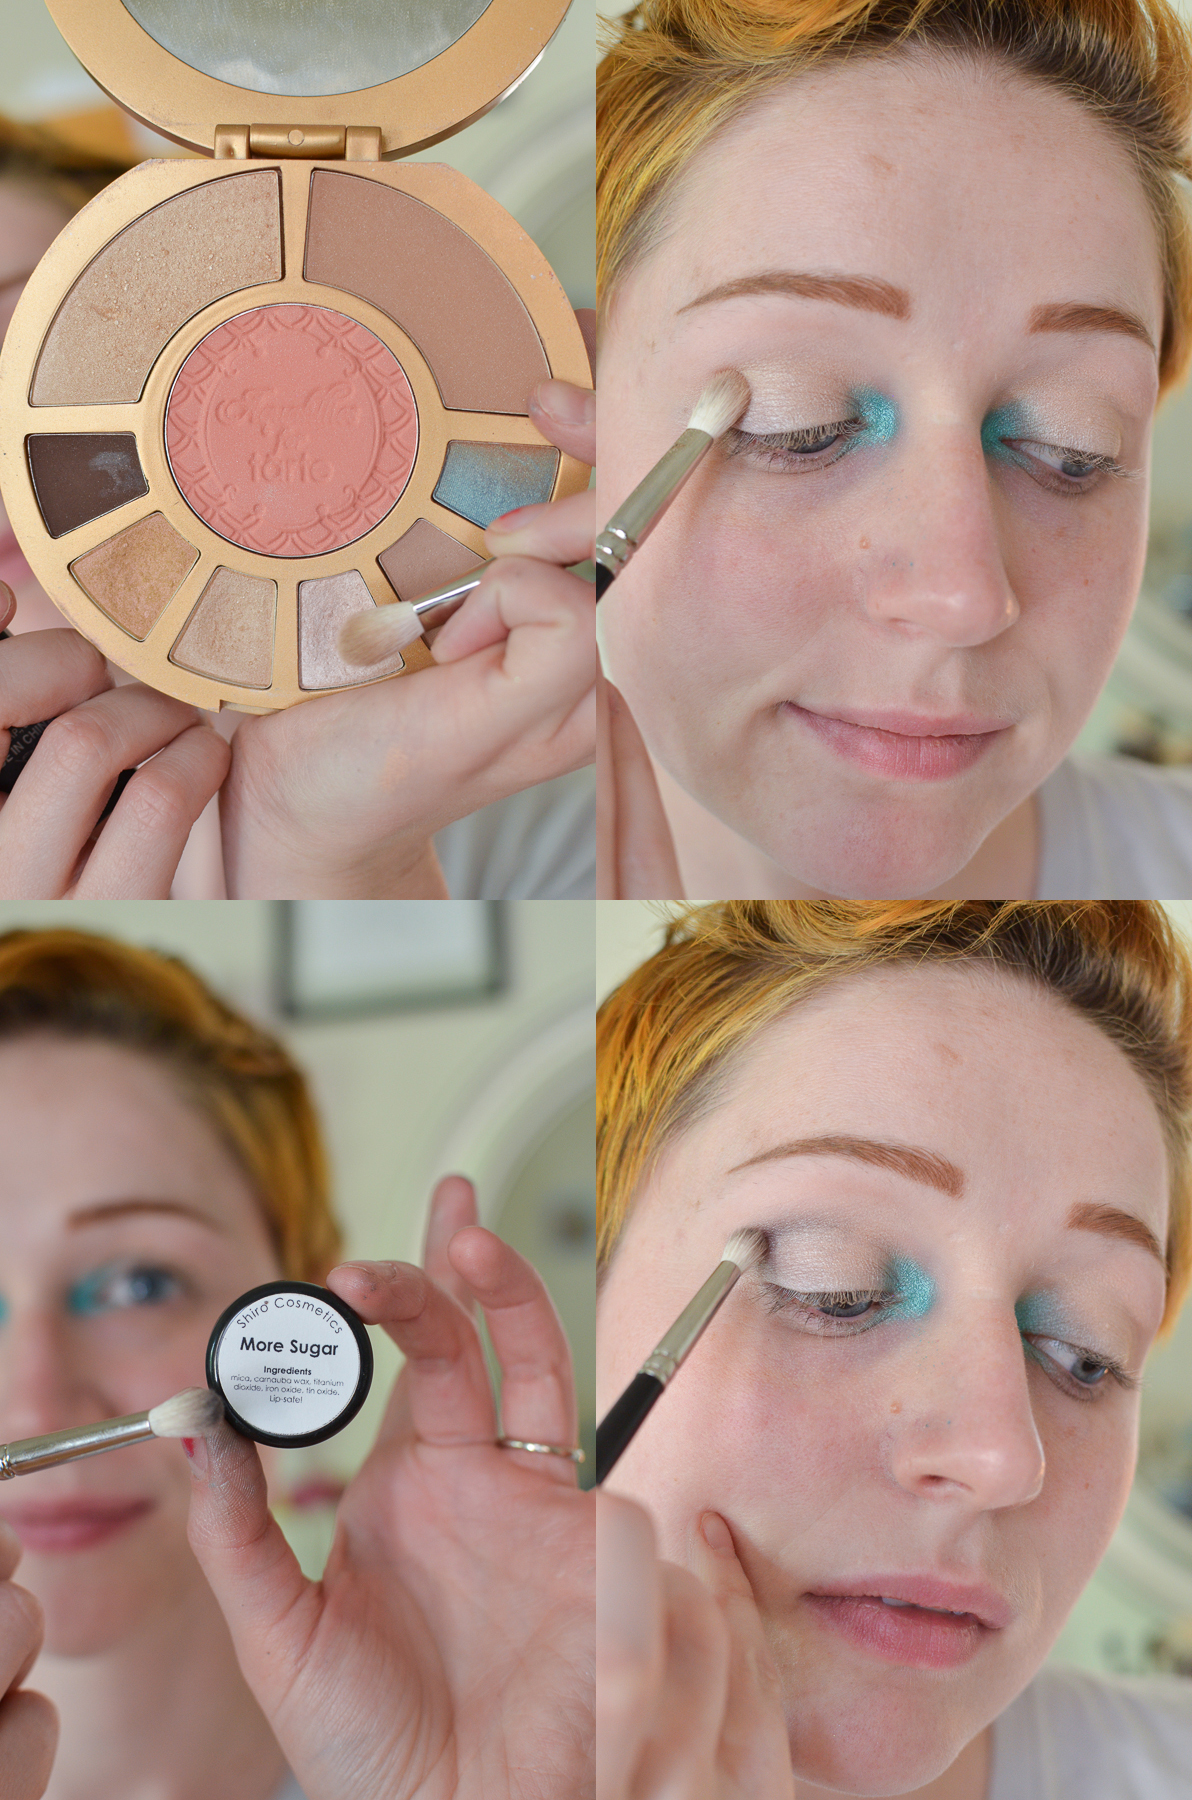
In a clear effort to not make this easy to duplicate, I then switched to my next favorite palette, Tarte Aqualillies. Though I am pointing to Parasol, I actually applied Barefoot (the light blonde color to the left of the one being pointed at) over the entire lid. Any pale, yellow-toned shadow will do here, I think. I love this particular shadow because it looks really luminous and applies like a dream. Next I took More Sugar and applied it into a V/cat eye shape to the outer corner of the lid, and slightly into the crease. I didn’t apply any Pixie Epoxy here, because though it is a loose shadow I wanted it to apply softer and more blown out.
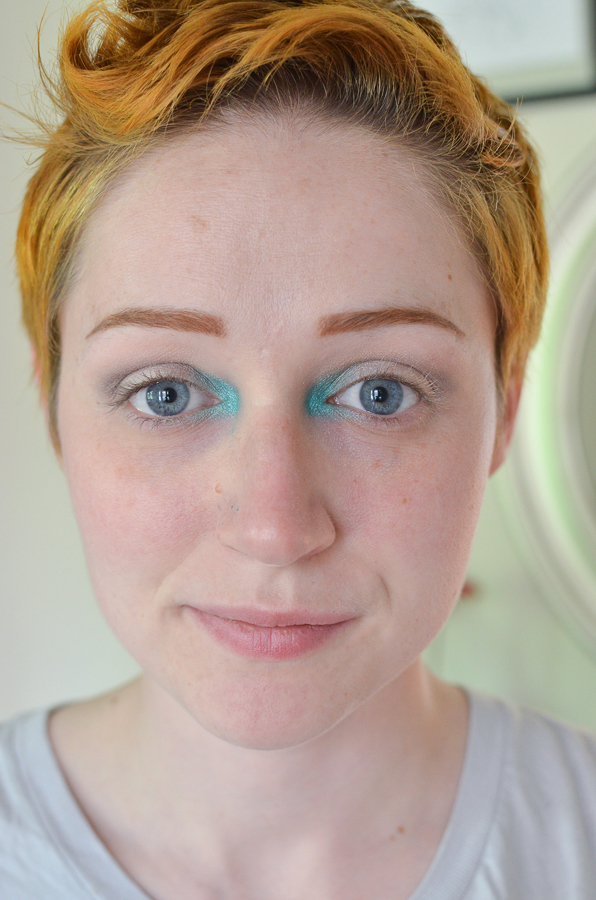
So, this is where we’re at so far. Thank christ we’re not stopping here.
Going back to Aqualillies, I applied Hammock (the dark brown shade) into the outer V to deepen it a bit. Then I took Pixie Epoxy and tapped it along the lower lid.
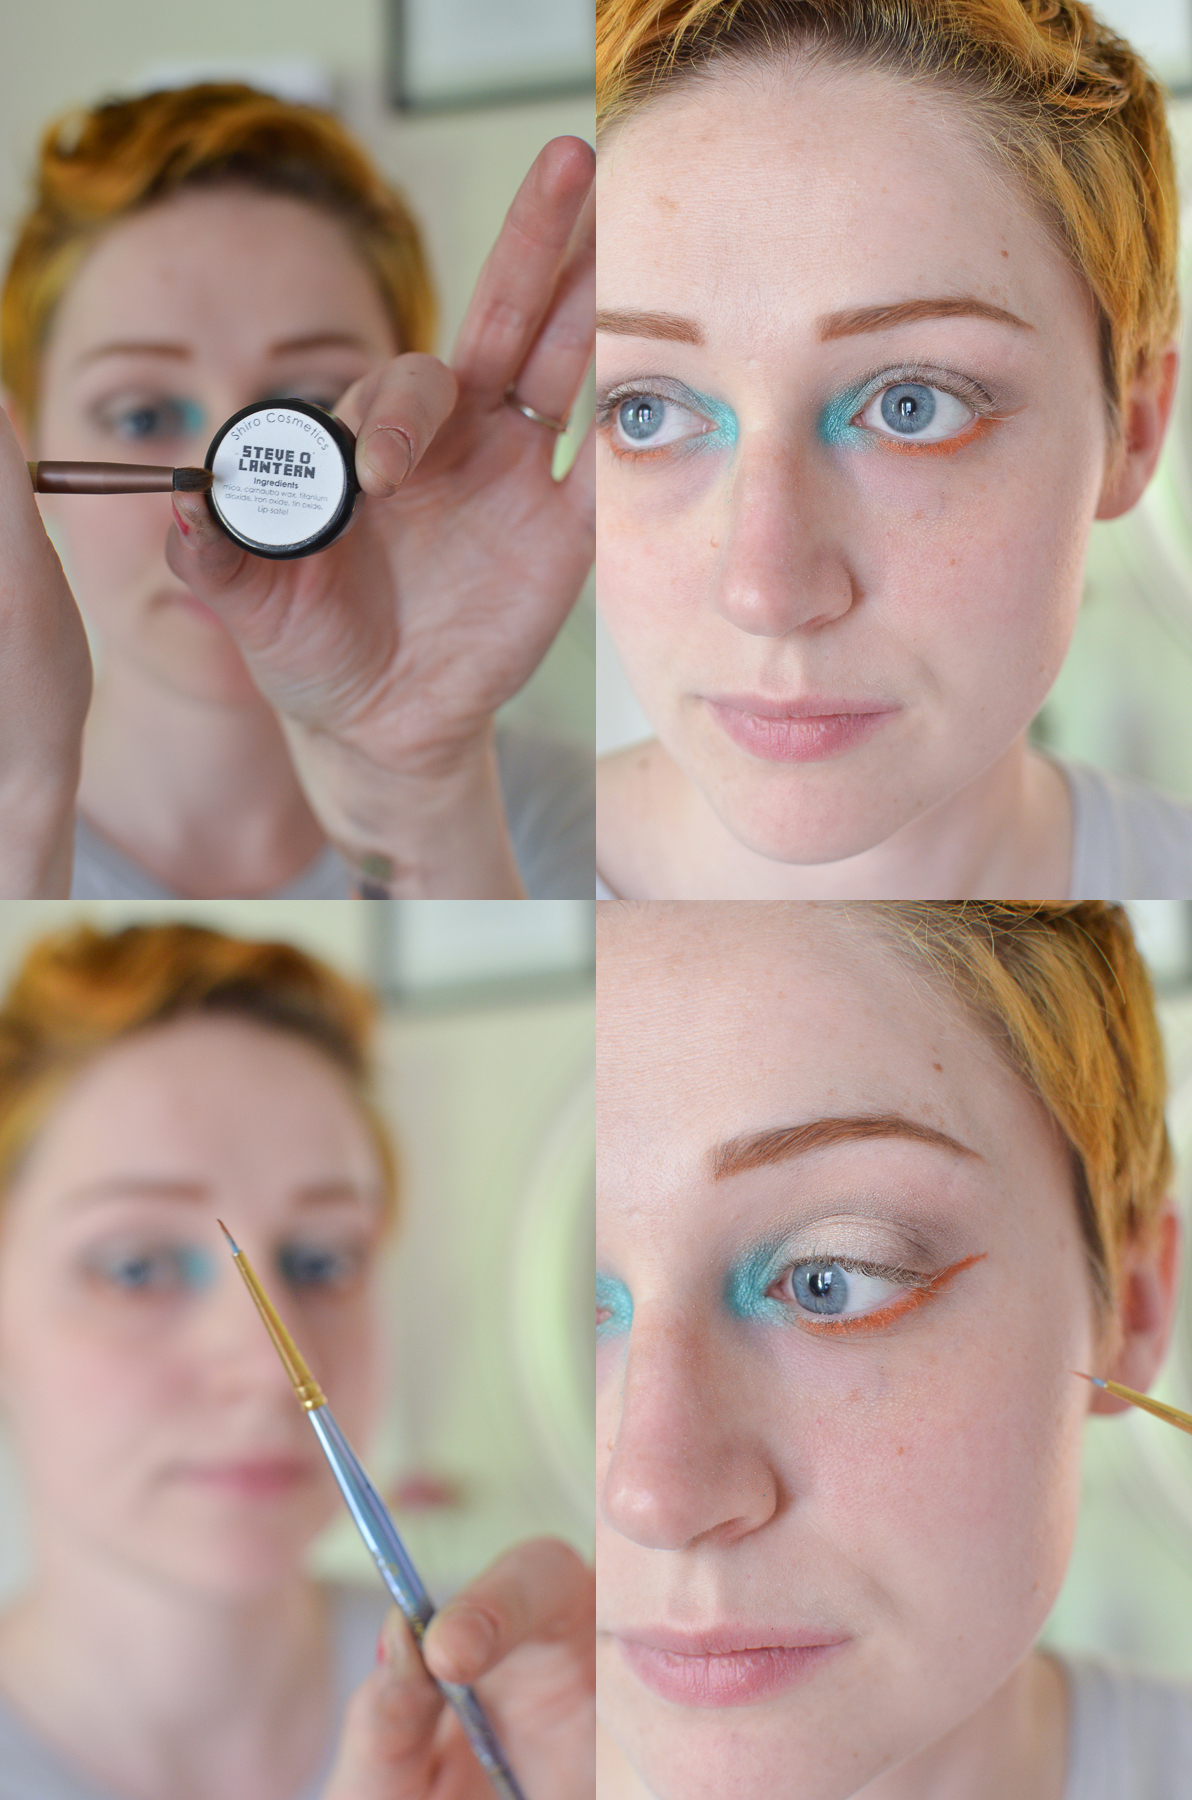
Now I took Steve-O-Lantern and lined my bottom lid with it. Mmmm, not weird at all. I took my teeniest brush (here it is ! It’s an acrylic paint brush) and applied a thin line of Pixie Epoxy out back like a wing from my eye, and then used the same brush to pat Steve-O-Lantern into a lower lid wing from my eye.
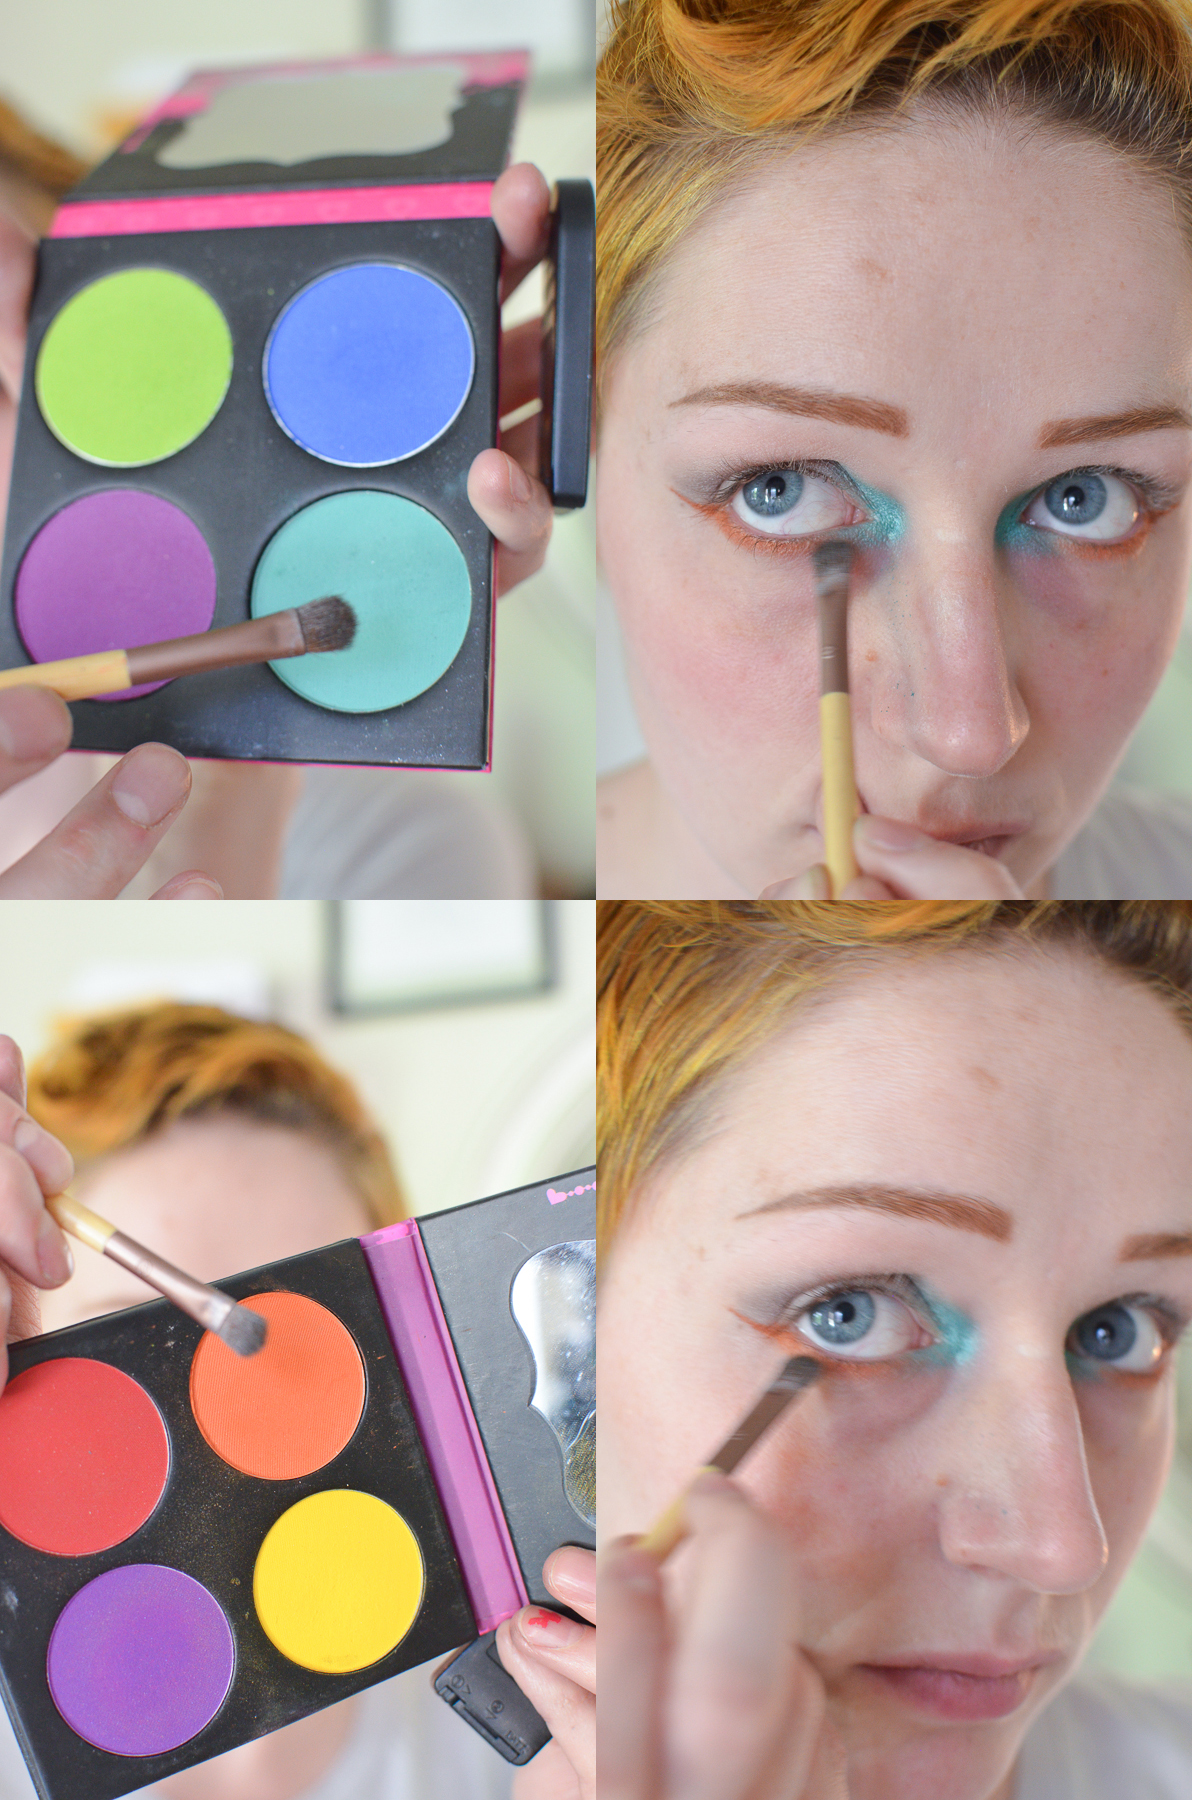
I wanted to make sure the color really popped, so I used Sugarpill Mochi and Sugarpill Flamepoint along the same area to intensify the colors and blend them better into the other shadows.
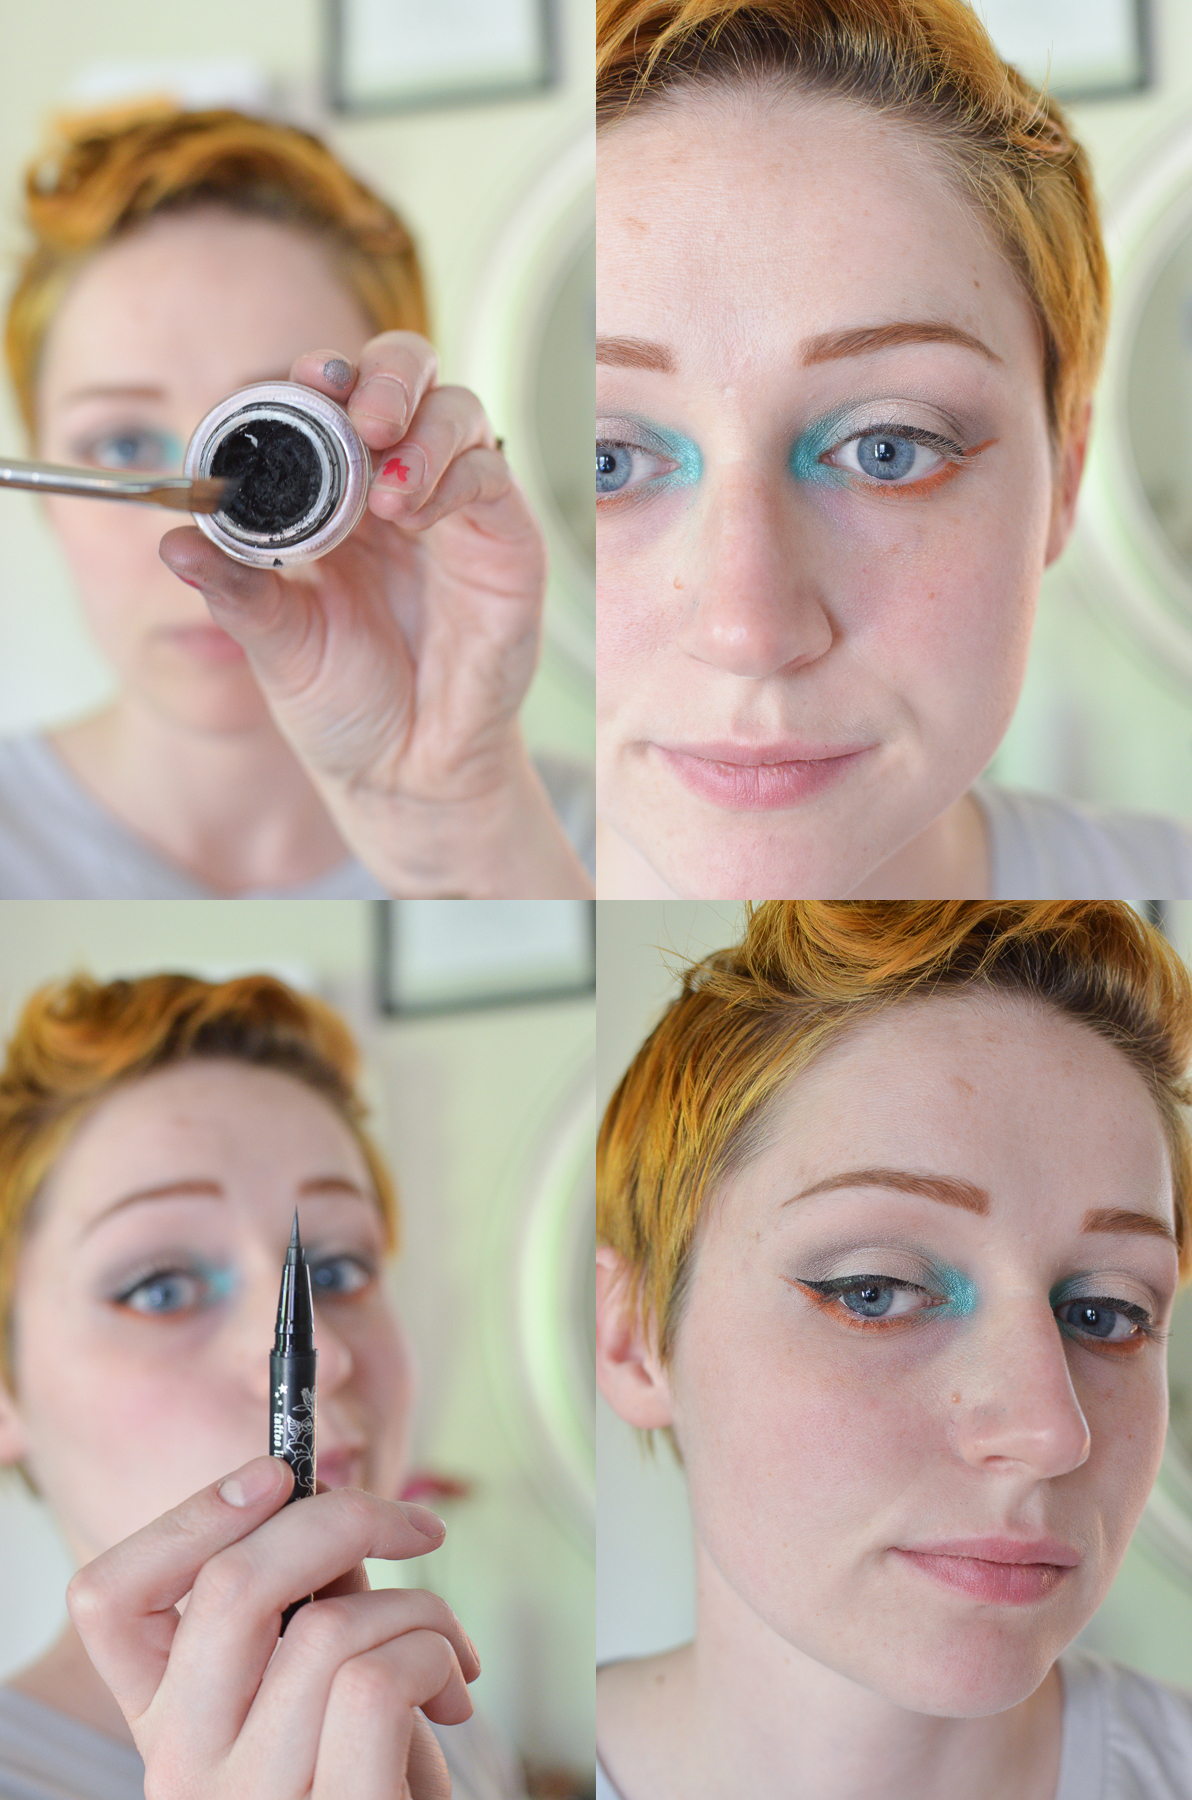
My Mac Blacktrack Fluidline is sort of shot right now, but I DID just get a proper angled brush for lining, so I used this to line most of the lid. Then I took the Kat Von D Tattoo Liner to do the rest, because nothing is sharper and more cruelly accurate than the Kat Von D tattoo liner.
Update of where we’re at! Don’t feel too charmed just yet.
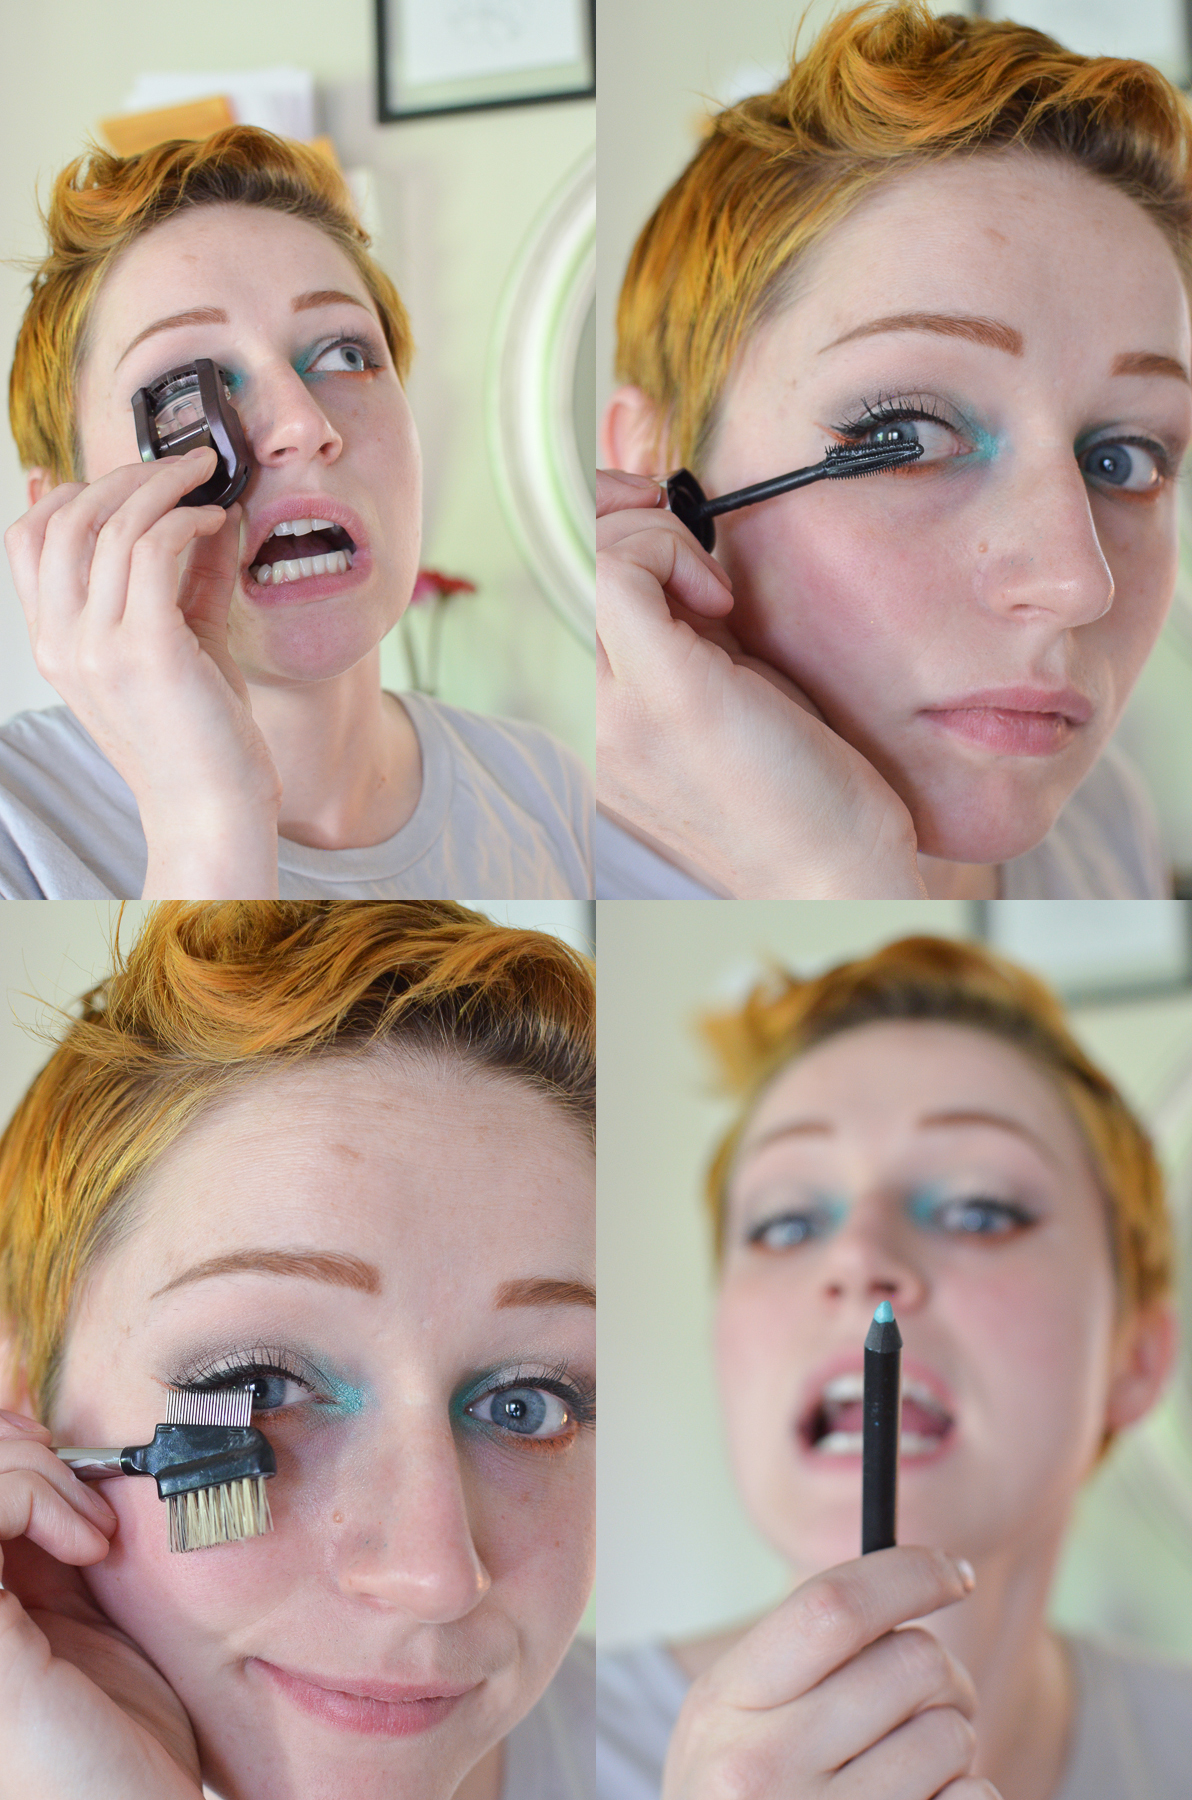
I used my eye pinchy to curl my lashes (mine is the Laura Mercier travel lash curler), then used my favorite mascara (L’oreal Voluminous Butterfly lashes). Next I used my most dangerous makeup tool, the metal eyelash brush, to brush that shit out. Brush and brush and brush, folks, seriously! But stabbing yourself doesn’t come recommended by the chef. I then snagged by The Makeup Store eye pencil in Blue Lagoon.
A tangential side note about The Makeup Store eye pencils: This shit does NOT. COME. OFF. In a good way. It’s quite waterproof. When I went into the store in Denver I started to swatch on my hand and the clerk came over looking a bit concerned. She asked if it was the eyeliners I put on my hand, and when I said yes she quickly brought me a special makeup remover wipe, explaining that they are very hard to get off. Little did she know I have no shame walking around with swatches of all kinds of things all over my hands, but she was right, this stuff is really very long lasting.
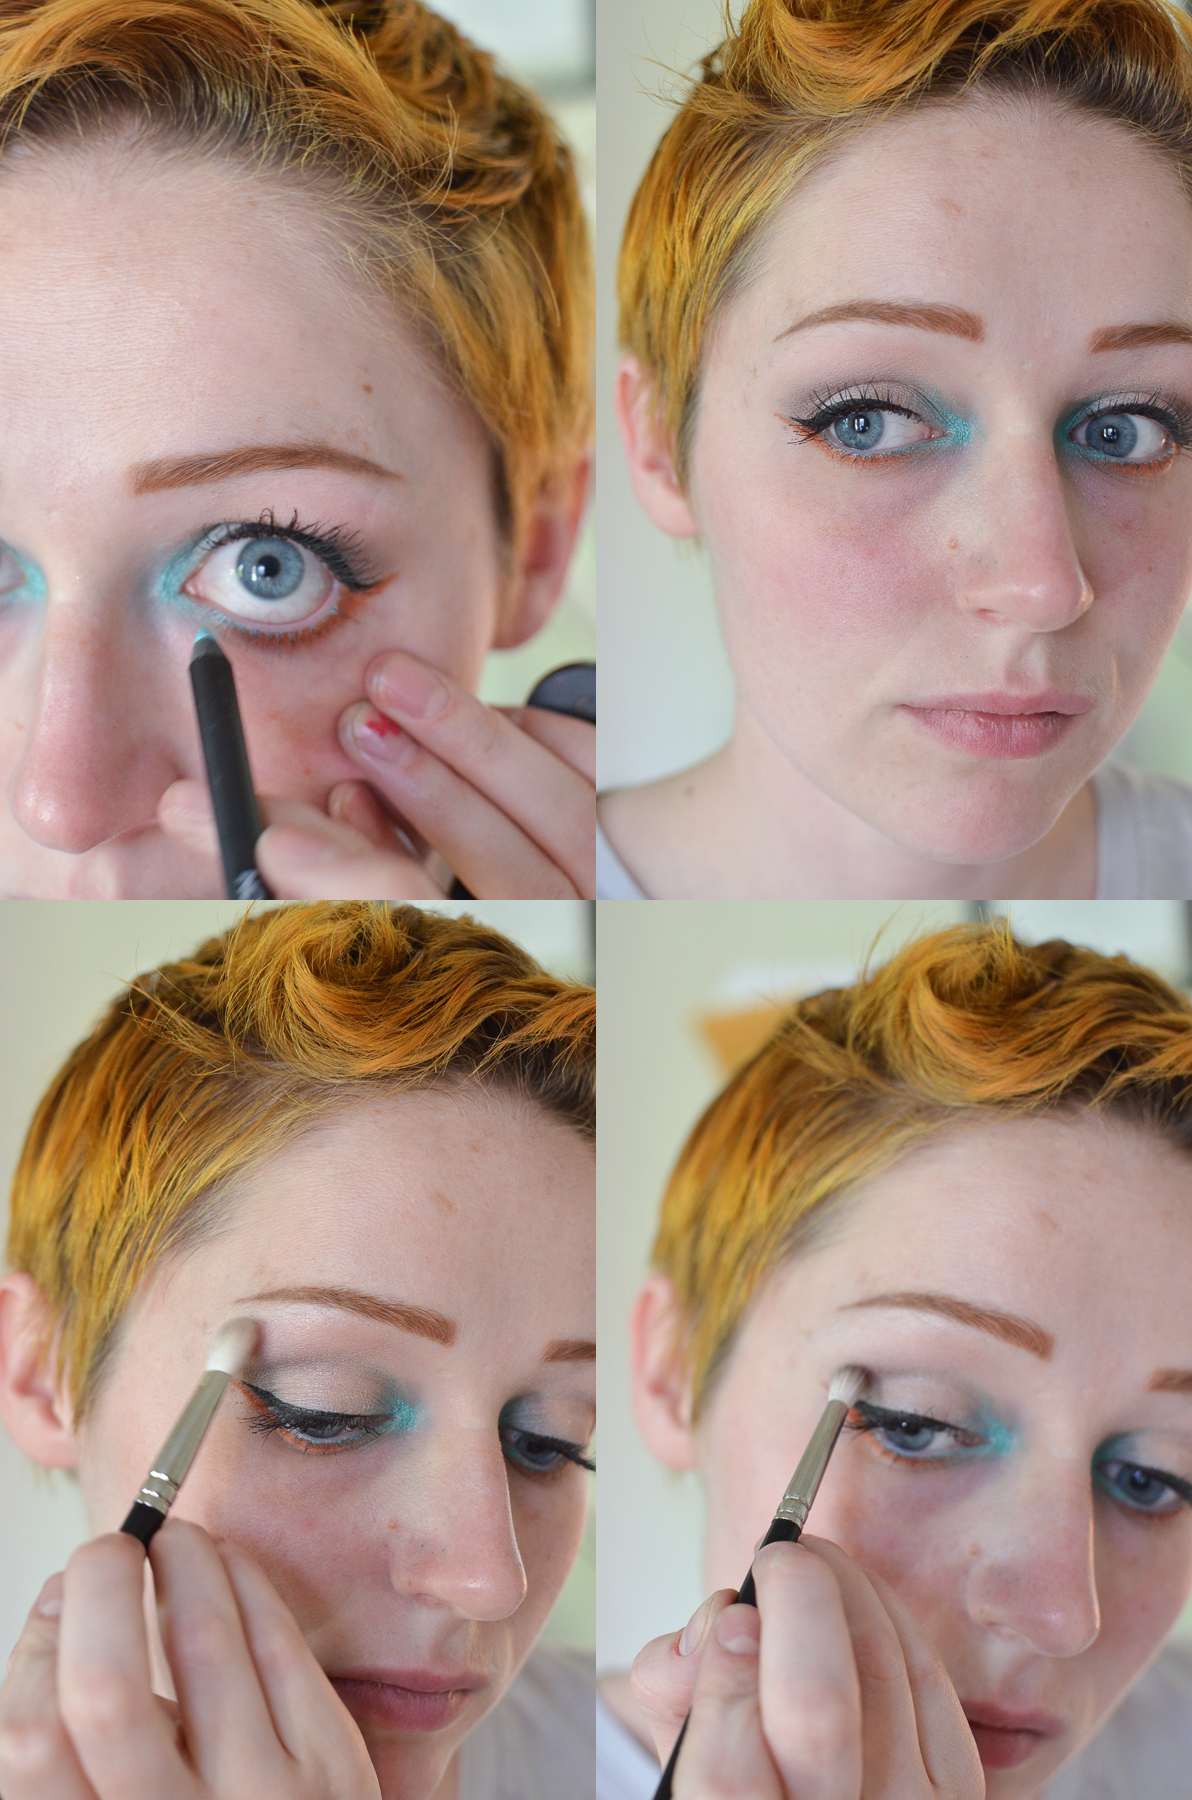
All individuals in the eye medical profession look away– this is how I apply pencils to my lower waterline. Which I think is how most people apply pencils to their lower waterline. I also applied some highlight to my browbone (Parasol from the Aqualillies palette), and then deepened the outer crease with more Hammock (also from the Aqualillies palette).
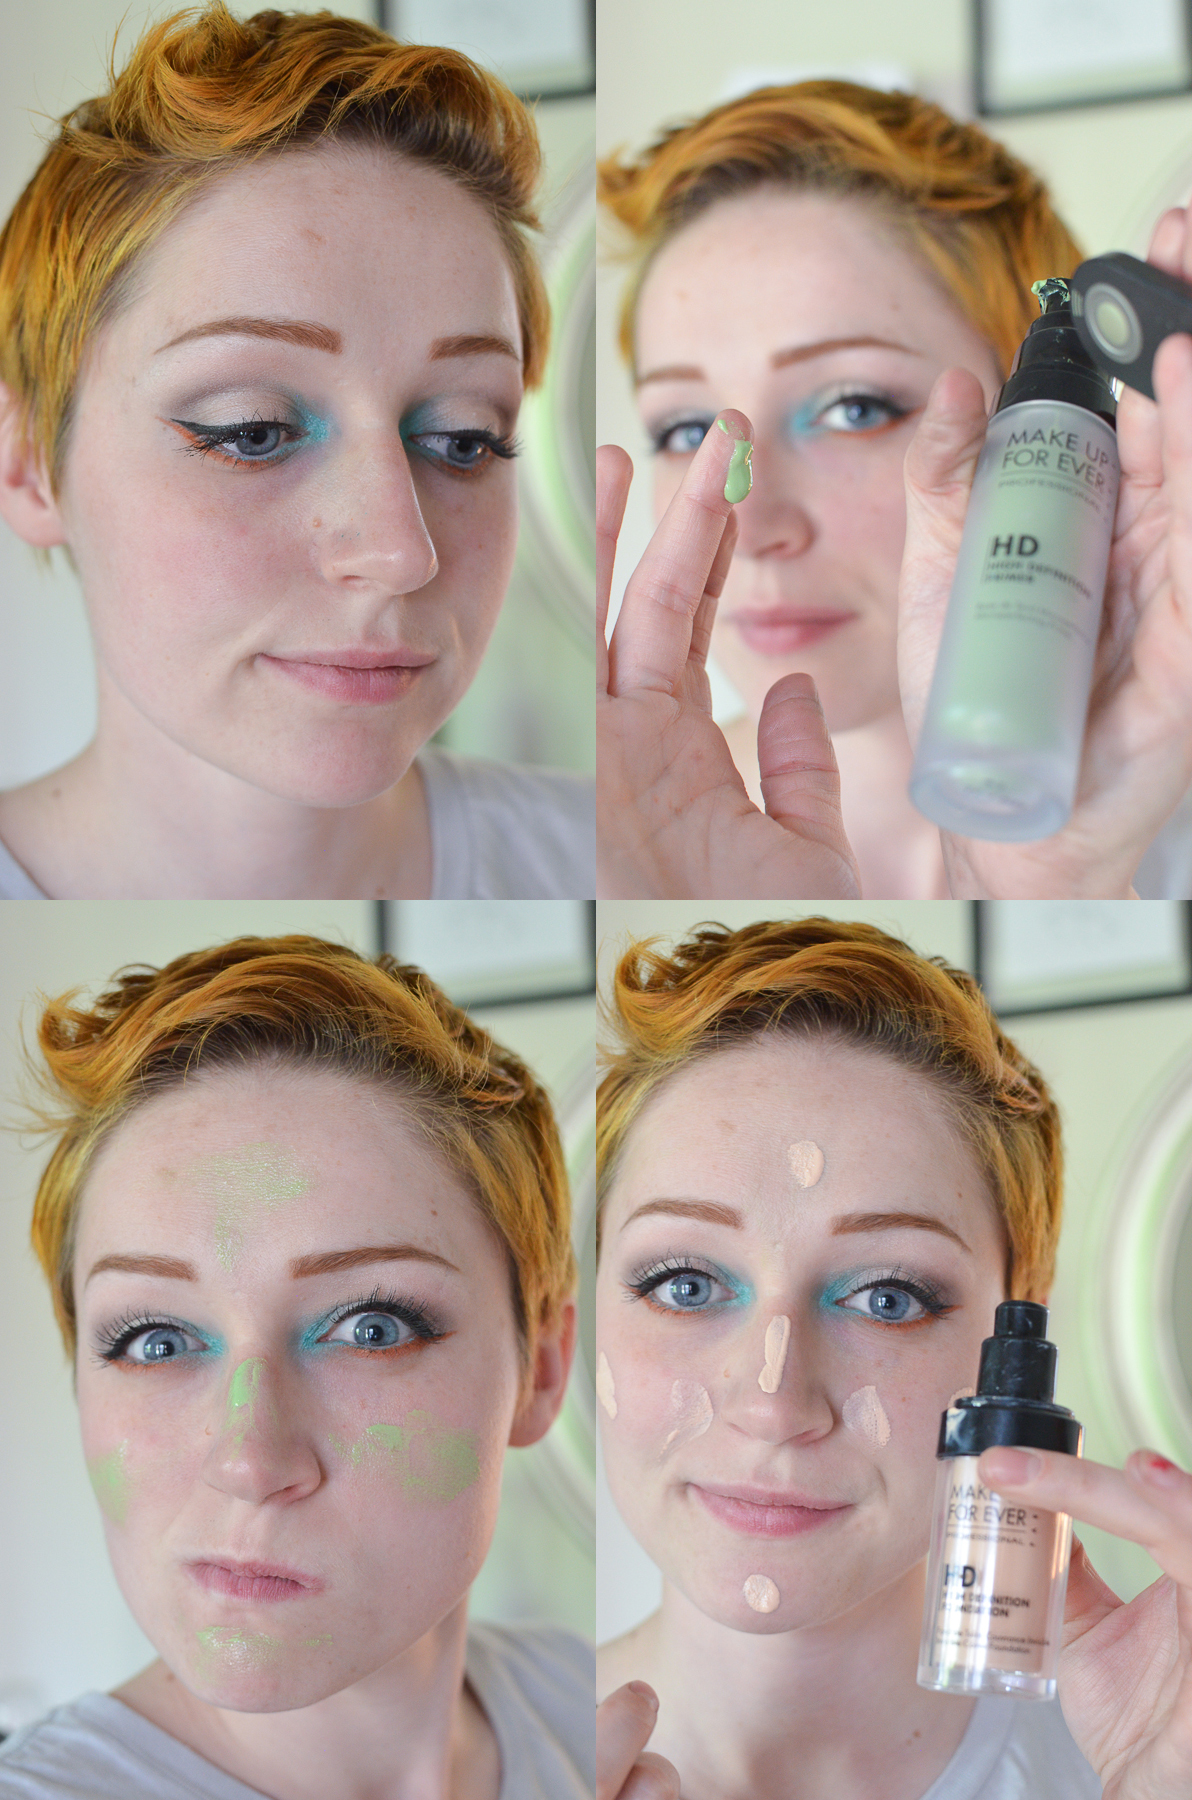
Ta da, eyes! Now onto the face! I’ve been using the green MUFE HD primer. As you can see, I have quite a lot of pink to my skin, and mild rosacea that is currently under control with a very mild skincare routine. Though it alone doesn’t solve all of my redness issues I do think it helps quite a bit. I also use MUFE HD foundation in 110, which is currently my perfect match and works wonderfully with my skin. I found it after using about 20 other foundations and finally stumbled across this one… I love you, MUFE HD foundation. Sniff.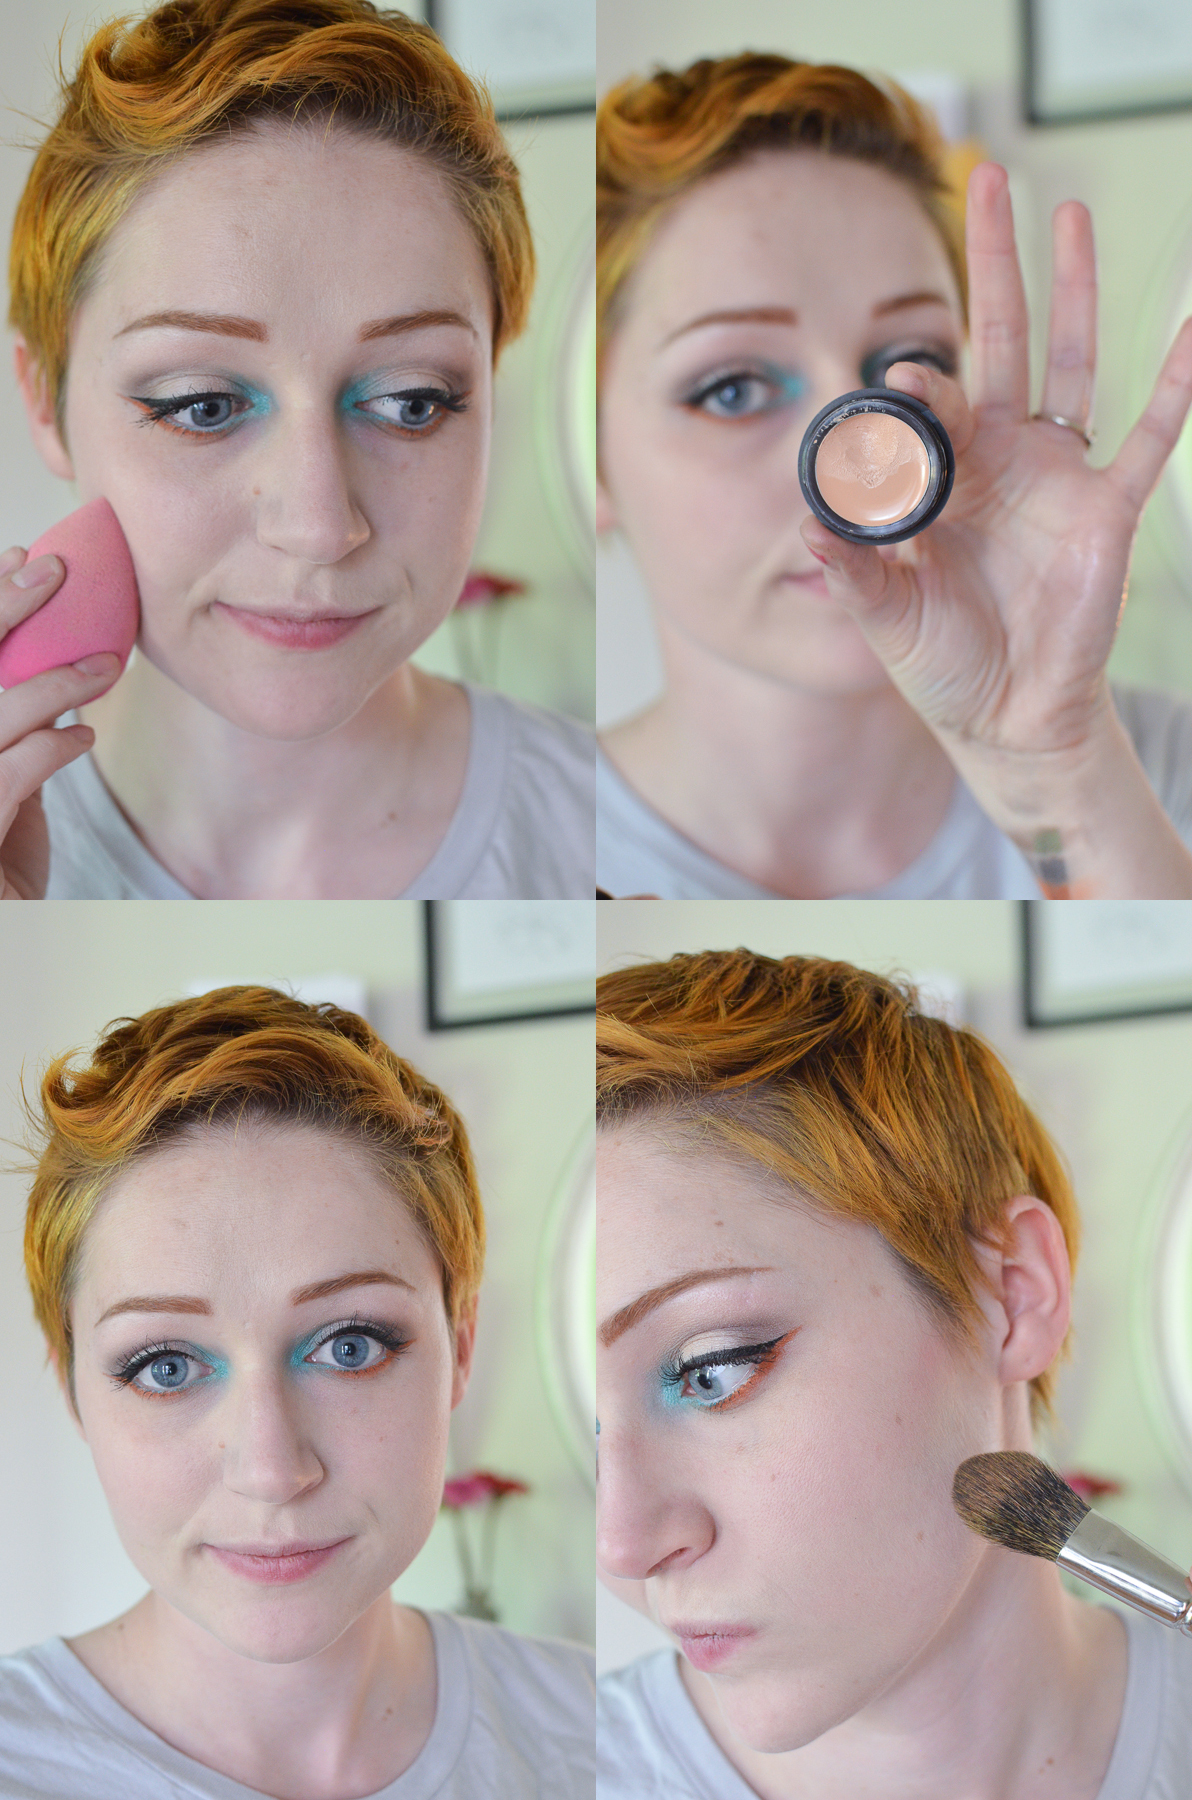
Beauty blender that foundation onto the face, and then go in for the dark circles! I use the Laura Mercier Secret Concealer in 01. You should use whatever makes you feel fly. Blend that in, and then use a darker toned blush to carve out your cheek bones a little bit, as seen in the last picture. I used Laura Mercier Violet Orchid second skin blush. This is where the technique from u/HobbitQueen begins.
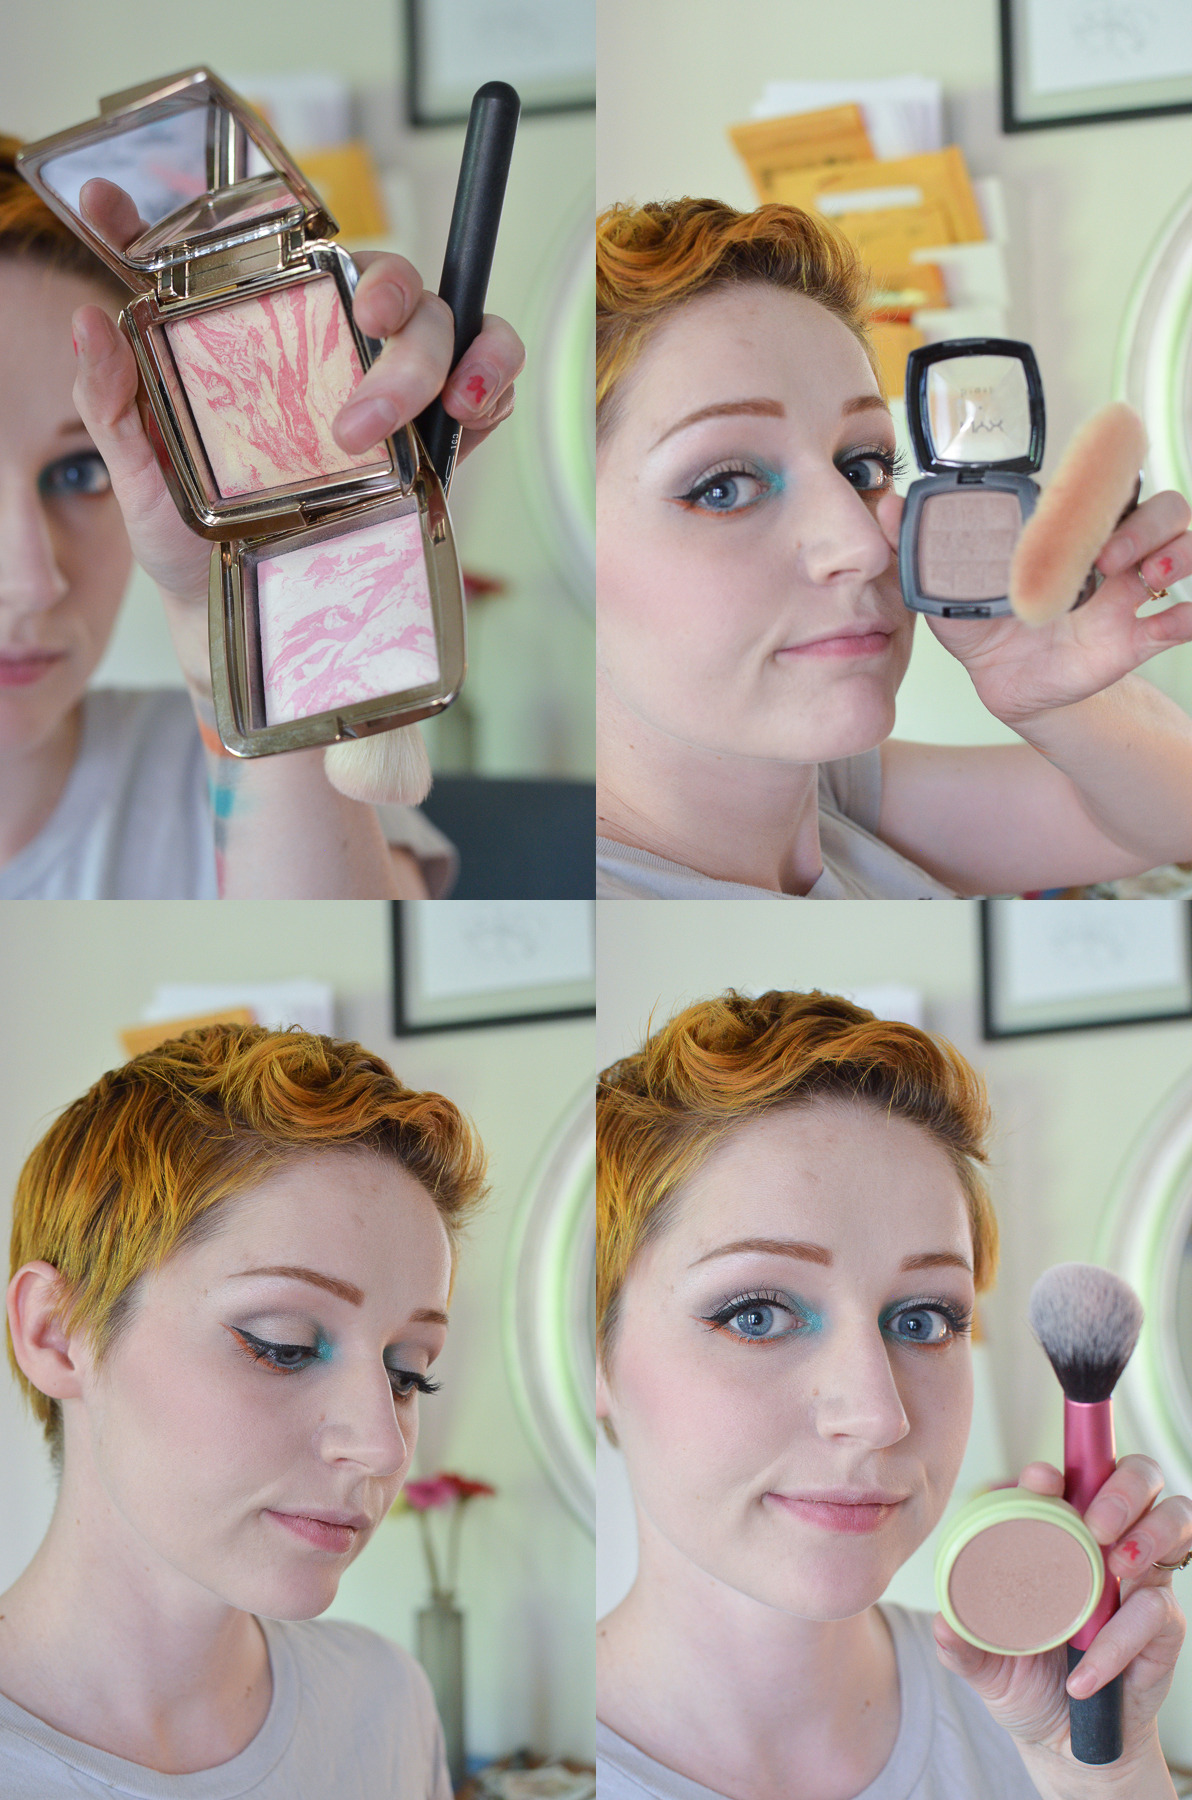
I used both Diffused Heat and Ethereal Glow from the Hourglass Ambient Lighting Blushes from here, and applied Diffused Heat slightly above the Laura Mercier Violet Orchid blush by patting it onto my cheek bone. I then used Ethereal Glow to blend back along both of the blush shades, and then used NYX Taupe to add definition to the cheek contour. Bronzer is usually sort of a dirty word for me, but I used Pixi Subtly Suntouched Beauty Bronzer beside my eyes, along my chin, and on my forehead.
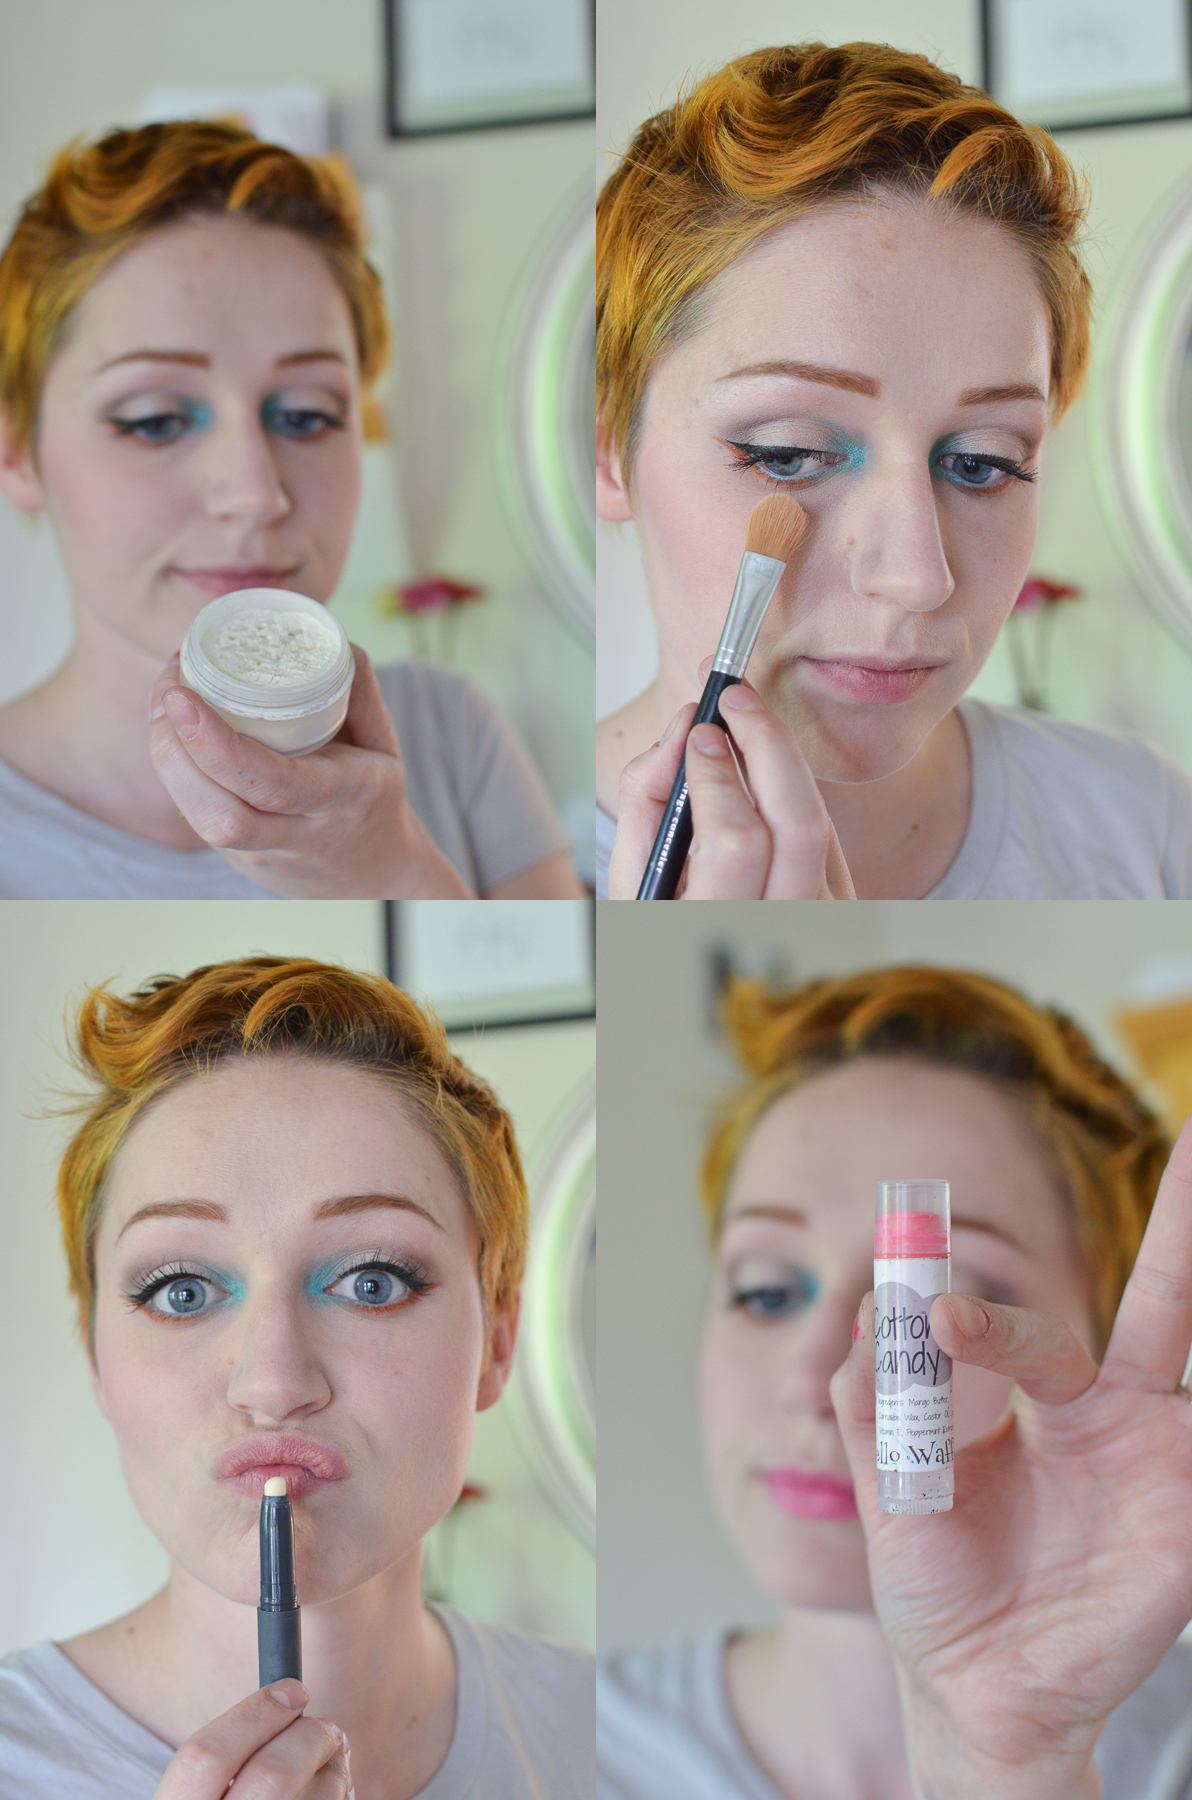
Coming down the home stretch! The Laura Mercier Secret Brightening Powder is my HG setting powder for under eye concealer. This is the item that I never can find when I go to reach for it (I assume because it is so secret), and won’t stop searching for because nothing else measures up, honestly. I’ve had this container for about four years now, and have maybe used half of it (though have only been using it daily for the past year), so a little goes a long way. Take that shit and pat it onto your under eye area, then bask in the seven extra hours of sleep it looks like you got.
Very last, I applied the BITE Beauty lip primer, and then the Hello Waffle Cotton Candy tinted lip balm. I’ll be honest, Hello Waffle’s lip balms are a little more slippy than I would like (it tends to get all over my teeth), but I adore her colors so much that I wear them anyway, and my lips like how moisturizing they are. Also, Christine is one of the nicest people around and is a fantastic seller to purchase from, in my personal opinion.
The Results
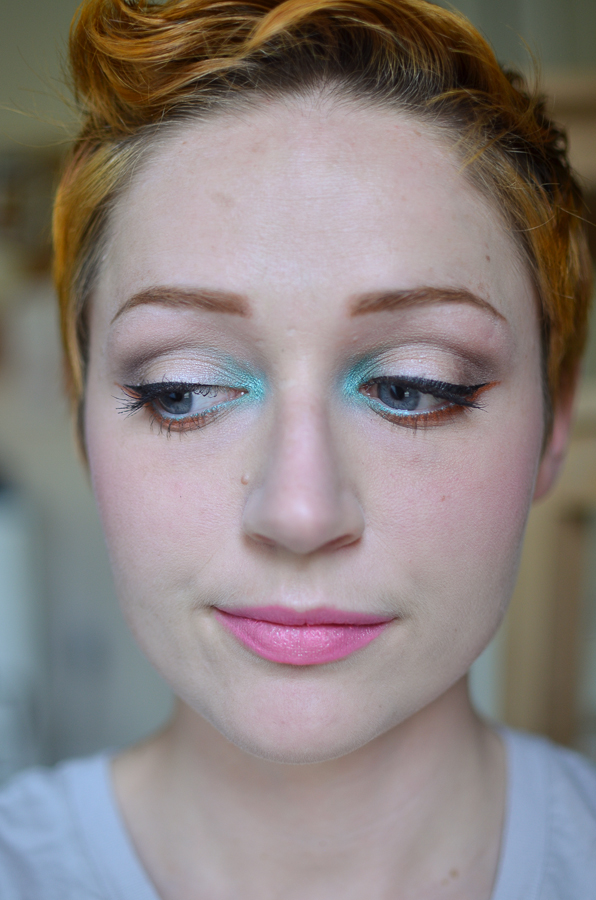
So, an hour later, here is what all that turns into:
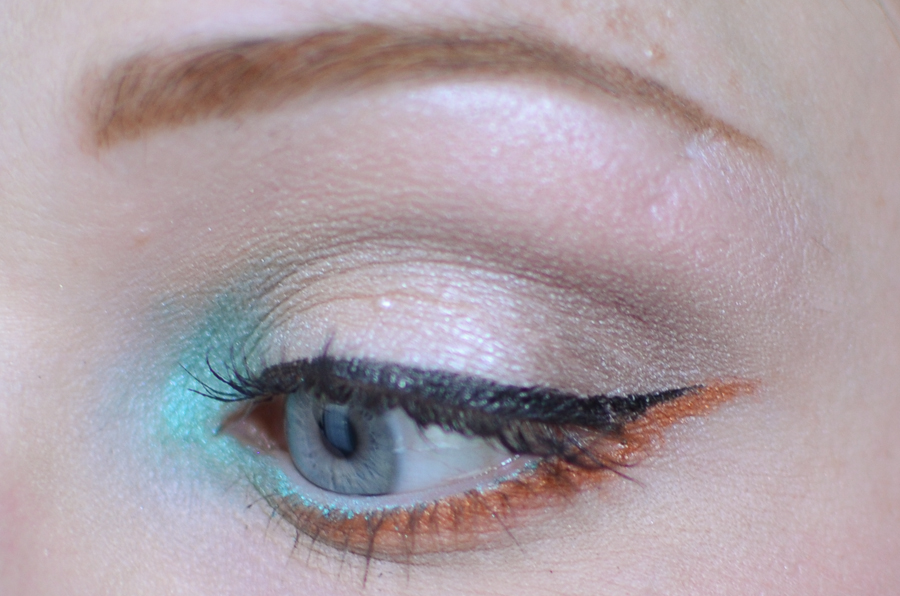
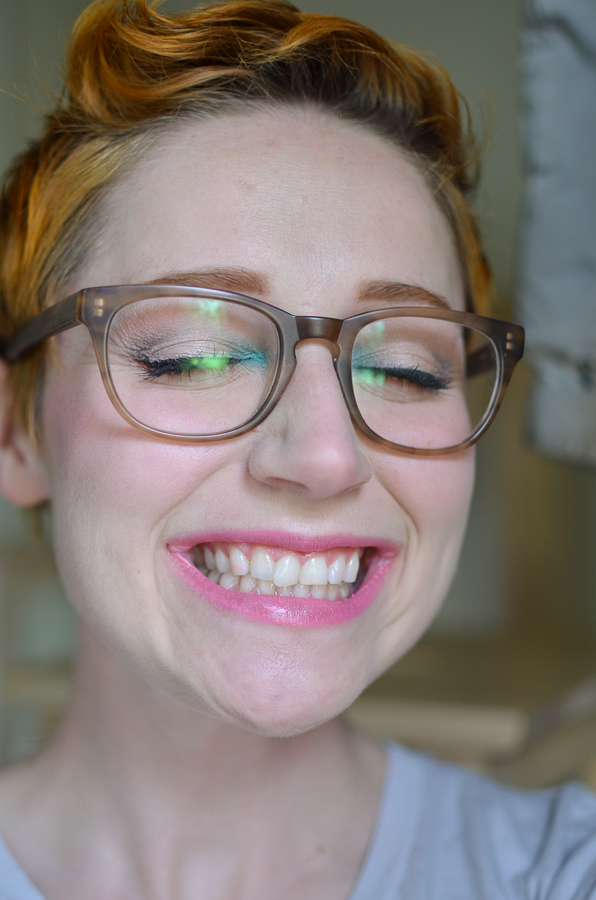
A close up of the eye
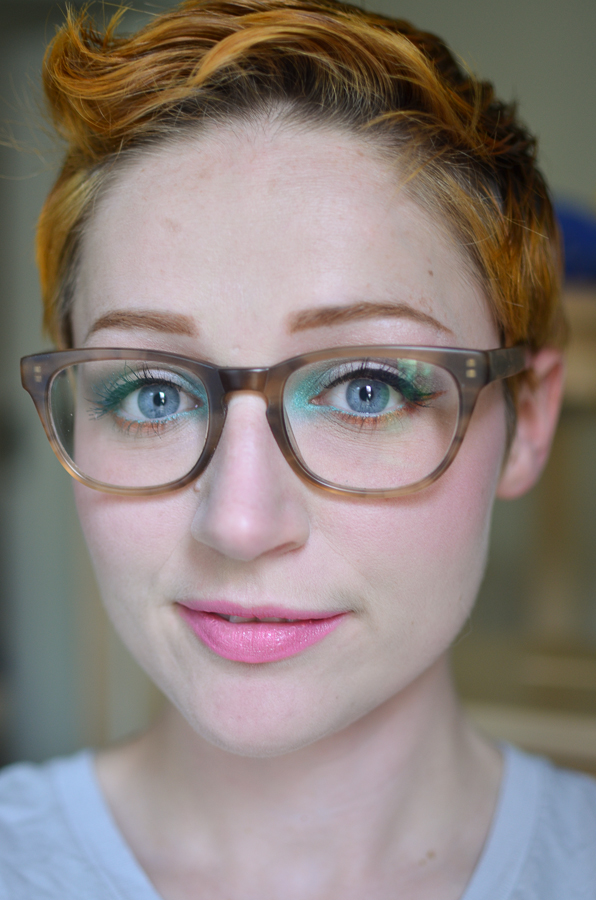
One thing I love about being a glasses wearer and more out-there looks like this: Glasses make them sort of secret, subtle surprises!
After a super busy day, being able to spend some time doing makeup is a great stress reliever!
Products
The things I used! 🙂
- MUFE HD Foundation in 110
- MUFE HD primer in green
- NARS smudge-proof eye primer
- Fyrinnae Pixie Epoxy
- Laura Mercier Secret Concealer in 01 and Secret Brightening Powder
- Tarte Aqualillies palette
- Shiro Steve, Steve-o-Lanter, and More Sugar
- Laura Mercier Vanilla Nuts shadow
- MAC Blacktrack fluidline
- Kat Von D Tattoo liner
- L’oreal Voluminous Butterfly Lashes
- Pixi Subtly Suntouched Bronzer
- Laura Mercier second skin blush in Violet Orchid
- Hourglass Ambient Lighting Blush in Ethereal Glow and Diffused Heat
- NYX Taupe blush
- Anastasia Brow Wiz pencil in Caramel and powder duo in Strawburn
- BITE Beauty Lip Primer
- Hello Waffle tinted moisturizer in Cotton Candy
Things I am Looking Forward To:
- Darling Girl Cosmetics opened her cart back up today (so glad to see that it seems like her family is feeling better!), so I ordered a buttload of her coolest shadows to give a try!
- I finally pulled the trigger on Darling Clandestine perfumes, and am waiting for Blue Valentine, Pistolas, and Pyrotechnik. Woohoo!
Your Turn!
So, that’s it everybody. What crazy looks have you done recently?
It should be noted that I purchased these products completely on my own and am reviewing them independently, without affiliation to anything or anyone other than my mild (ahem) addiction to makeup.

great documentation, and you’re making it look easy.
You are really sweet, thank you very much! 🙂
I’ve always been really impressed by your photos on /r/makeupaddiction and I was so pleasantly surprised to find out you have a blog! I’m loving all the in-depth reviews and tutorials you do.
Speaking of crazy looks, have you considered ordering one of the Shiro custom glosses? I actually ordered one with Steve O’Lantern and it is absolutely stunning.
Thank you so much, I’m so glad that the info on here appeals to you! If there is anything you think you might like to see, please feel free to shout it out!
I actually HAVE ordered a Shiro custom gloss, and I am SO EXCITED FOR IT. Haha 🙂 I got a gloss in Plausible Walrus, with moderate opacity… I think with the frosting scent, because that is what Caitlin recommended. My order hasn’t shipped quite yet, and I think I may have another week before it does, but I am working on being awfully patient in the mean time.